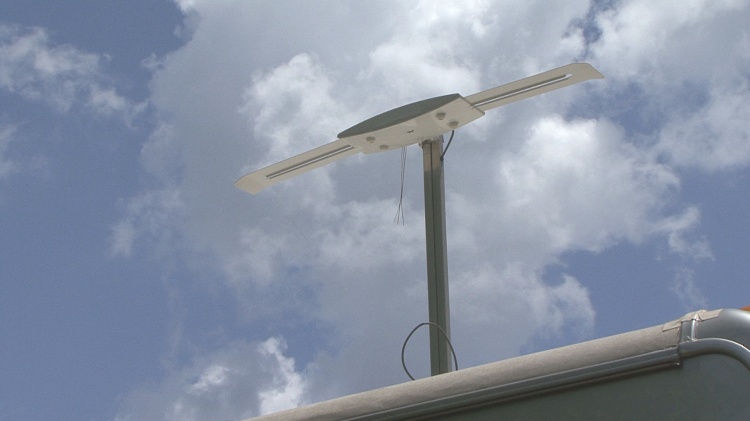
Last year I started having problems with our old bat wing style TV antenna on the RV, so I decided to replace it with a digital RV antenna. After some research on the topic I decided to go with the Rayzar Z1 HD digital RV antenna by Winegard.

There were several reasons I selected this antenna. It is low profile, lightweight and it picks up free HD channels wherever you travel. Another reason I selected this antenna is because it can replace the existing antenna with minimal effort.
You can purchase the Rayzar z1 as a complete unit or as the antenna head with adapter. It would be easier and less expensive to go with the antenna head that retrofits directly to the existing antenna, but as I mentioned earlier our antenna has seen better days so I opted to go with the complete unit.
 Caution: Exercise caution when you are working on the RV roof, a fall can result in serious injury or worse. If you are not comfortable working on the RV roof have the work done by a qualified RV service facility.
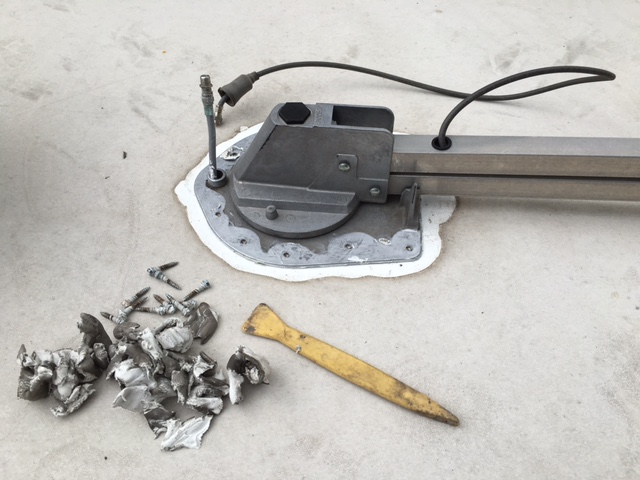
The first step was to remove the old antenna. I used a plastic scraping tool to remove the old sealant and access the mounting screws. Whenever you remove old sealant from a rubber roof be extremely careful not to tear the rubber roofing. Remove all of the sealant and the mounting screws, but do not attempt to remove the antenna before you remove the antenna handle on the inside of the RV.
Go inside the RV and remove the old antenna handle. Remove the Allen screw from the handle using the correct size Allen wrench. After the handle is removed the entire assembly can be removed from the ceiling.

Go back on the roof to remove the old antenna. Disconnect the coax cable and carefully separate the antenna from the roof. In most cases there will be putty tape under the antenna base. I use the plastic scraping tool to work around the base releasing the old sealant. Try not to tear the roofing material. After the antenna is removed clean any remaining sealant that was under the antenna base. As a final step I like to clean the roof surface with some denatured alcohol on a rag. Do not pour the alcohol directly on the roof surface.

If this was a new installation this is where you would select a location for the new antenna and drill a hole through the roof. Since I am replacing the existing antenna the hole is already there.
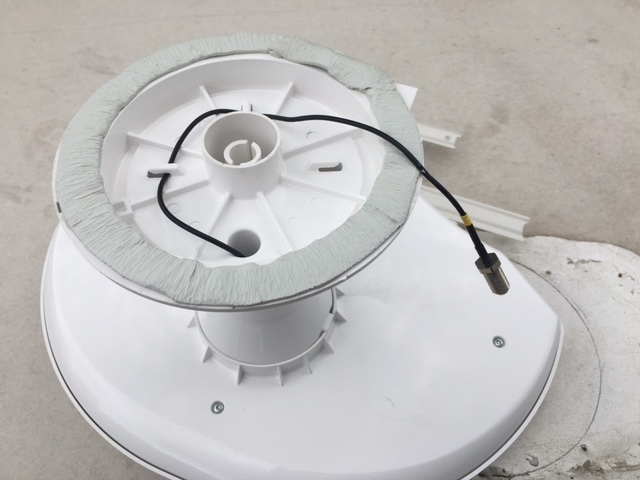
The instructions state to position the antenna in the hole with the arrow on the base plate facing the front of the RV, and draw an outline around the antenna base. The outline is used so you can apply an approved sealant around the inside surface of the line to seal the antenna base to the roof when it is installed. I prefer to apply the sealant directly on the antenna base so I know the screw holes are covered and I will get a good seal.

Connect the coax cable from the RV to the coax on the new antenna following the instructions. Position the antenna on the roof with the arrow at the base of the antenna facing the front of the RV.

There are screws provided to secure the antenna to the roof. I tighten the screws until I start to see the butyl tape ooze out around the edges. Remove any exposed butyl tape and apply an approved sealant over the screw heads and around the base of the antenna. This antenna has a smaller footprint than the original antenna so there were two existing screw holes in the roof that were not covered by the new antenna base. I added some sealant over the screw holes and as a precautionary measure I will add some roof sealing tape over the sealant after it cures.

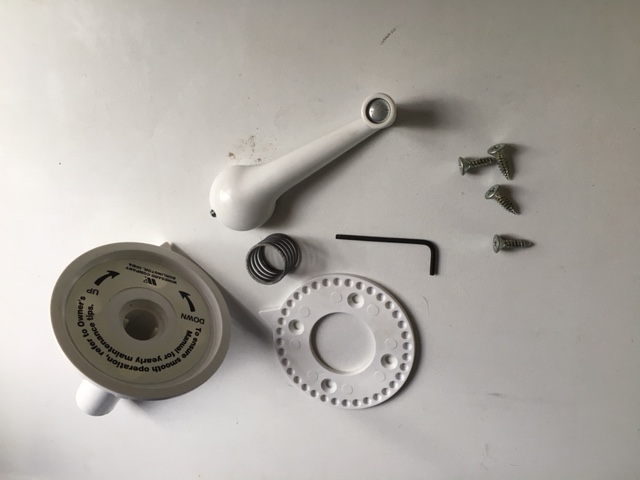
You are finished on the roof. The remainder of the installation is done inside the RV. Install the plastic extrusion in the hole and rotate it until the keys line up with the bottom of the antenna. With the keys aligned push the extrusion up until it bottoms out. Check to make sure the antenna rotates and follow the instructions to cut the extrusion to the proper length for your ceiling.
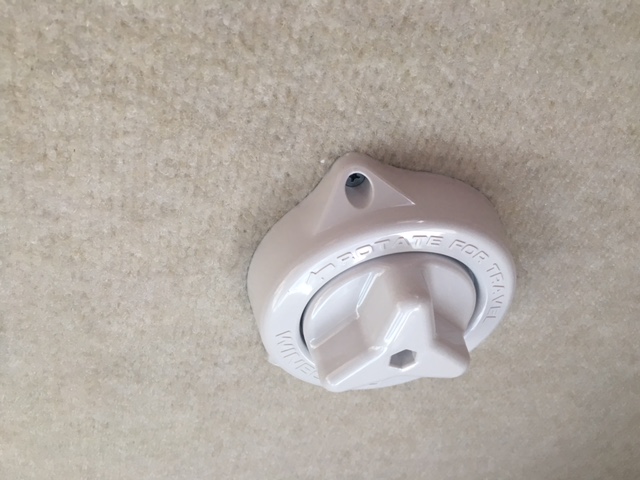
Follow the instructions to assemble the new handle and install the handle using the screws provided. Test the operation of the handle by pushing up on the handle and rotating it in either direction. The antenna on the roof should rotate as the handle is turned.
If this were a new installation the next step would be to install the provided wall plate and make the 12 volt DC power connections and the coax cable connections. Since I am replacing the existing antenna I already have a video switch box to make my coax cable connections.

After all of the connections are made turn the TV on and follow the TV’s instructions and perform a channel scan in the antenna mode. The new HD digital RV antenna will access local HD and digital broadcast channels in the area. To maximize the number of channels you receive you can fine tune the position of the antenna by rotating the handle.
Note: If you still have an analog television in your RV you will need a digital TV converter box to access local HD and digital broadcast channels.

That’s all there is to upgrading your old RV antenna to a new digital over the air antenna. Now you can enjoy HD TV channels no matter where your RV travels take you.
Subscribe to our RV 101® Youtube Channel
Happy Camping,
