I installed a weBoost Drive 4G-X RV in our motorhome a couple of years ago, and now we depend on it whenever we travel in the RV. We need to conduct business from the RV, just like we do at home, so a reliable signal and faster data are extremely important to us.
I do a lot of driving in my truck too, going back and forth to our shop. It’s an 80-mile round-trip, and I make the trip three to four times a week. We store our RV at the shop, we film videos at the shop and I work on my classic cars at the shop. We live in a rural area, and when I am out of the office, in the truck, I need a reliable signal I can depend on.
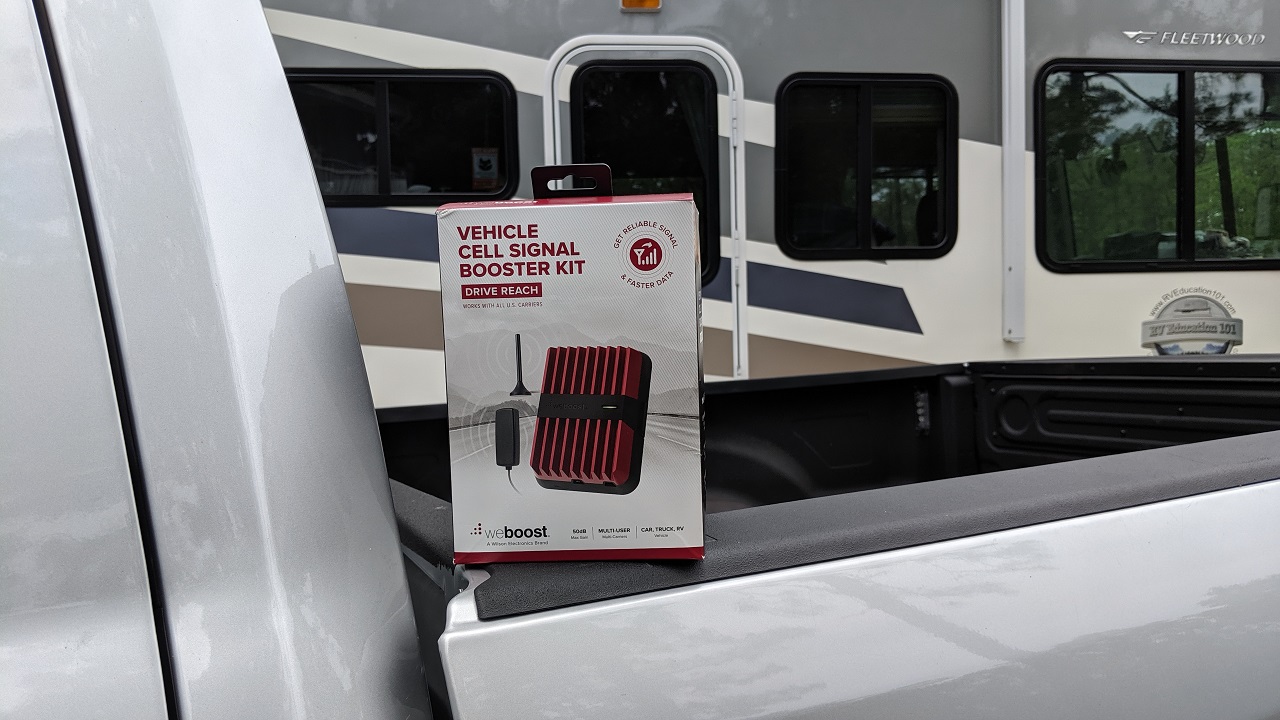
A company called weBoost, a Wilson Electronics brand reached out to me asking if I would like to review a new model cell signal booster called the DRIVE REACH. After experiencing really good results in the RV, I decided to install and review the new DRIVE REACH weBoost product in my truck. When I make the 80-mile (rural) round-trip there are a couple long stretches of road where the signal always drops, so this will be a real-world test of the product.
Let’s look at some features and benefits of the new DRIVE REACH product:

For starters, according to weBoost the product works on every network and with all U.S. carriers. It works with multi-users, and with a max gain of 50 decibels (dB). The max gain is important when you are shopping for a cell signal booster, and 50dB is really good. The decibel gain is amplification of the signal. The more it boosts the strength of the signal the better it will perform. This unit can get a signal 60% farther from the closest tower than previous boosters.
WeBoost DRIVE REACH Installation:
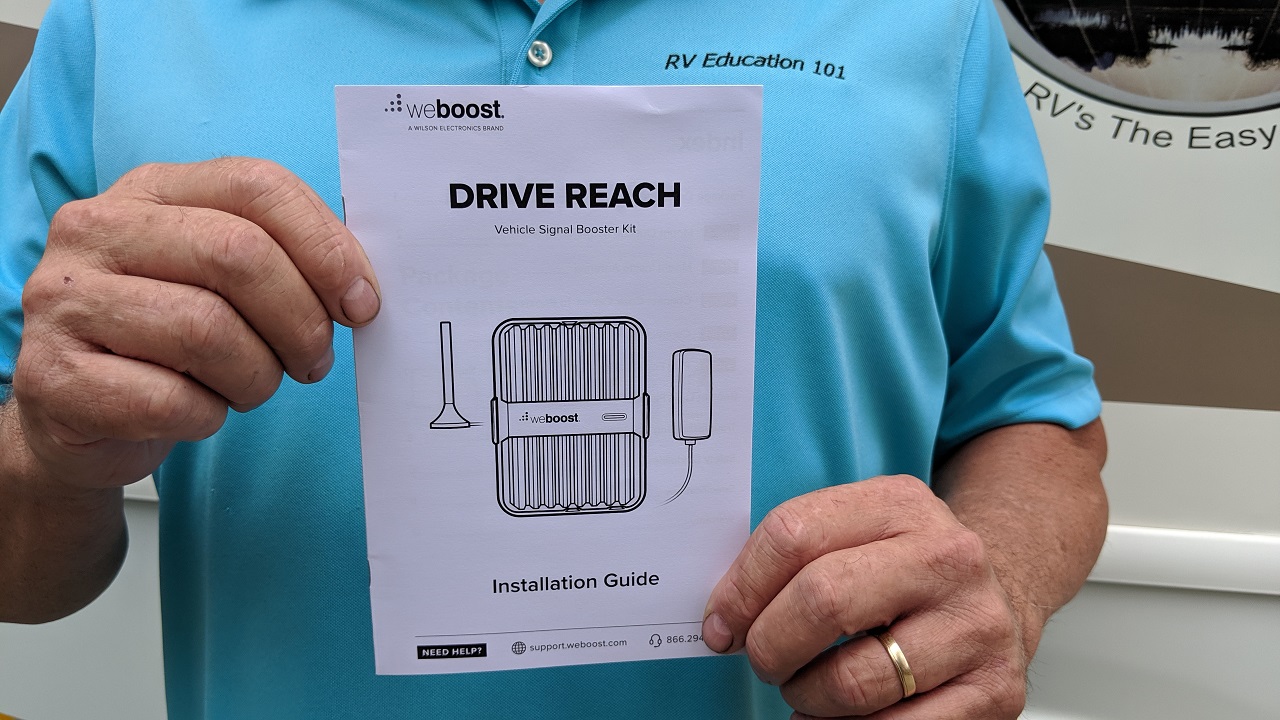
The DRIVE REACH is a tool-free installation. It only takes a few minutes to install the product in your vehicle.
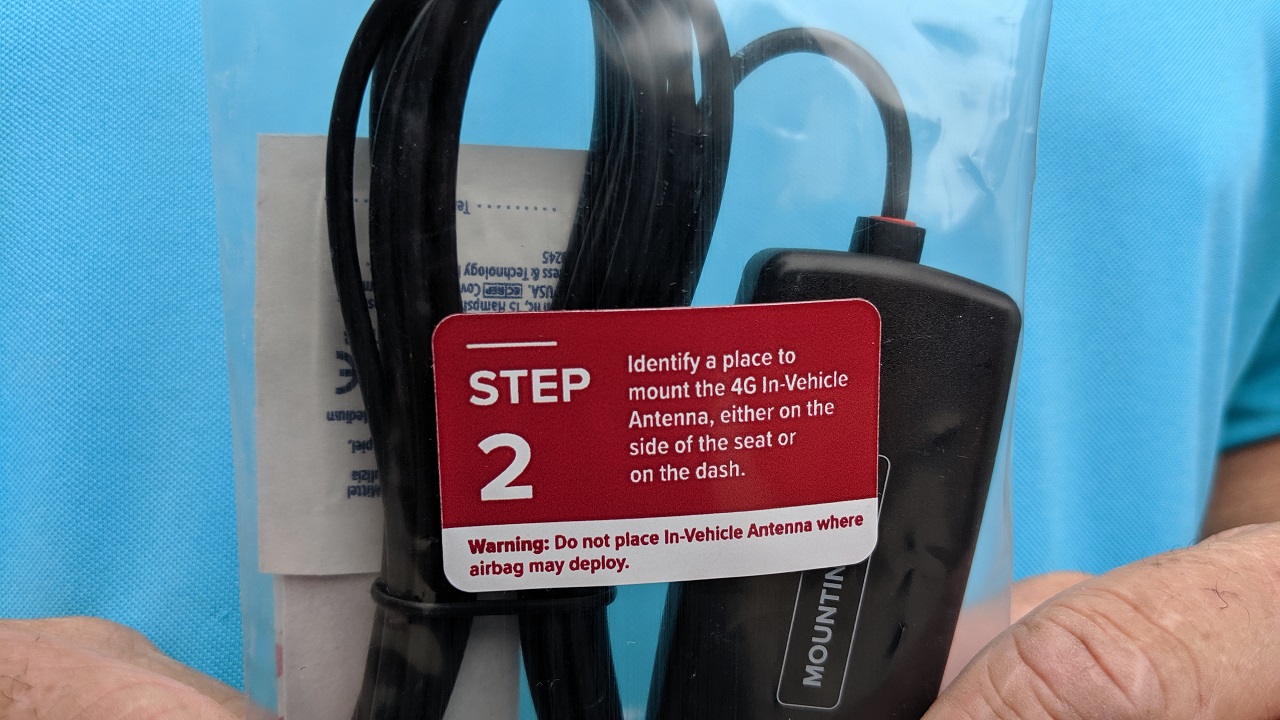
Each bag in the kit identifies the order to install the components in.

Step 1) Mount the outside magnetic antenna. Keep the antenna at least 12 inches away from other antennas, and away from windows and sunroofs. The installation instructions provide information for routing the antenna cable to the inside of the vehicle.
Step 2) Mount the inside antenna. Follow the instructions and use the included Velcro to mount the antenna. Warning: Do not mount the antenna in a location where airbags deploy.

Step 3) Connect the inside and outside antennas to the booster. The inlets are labeled on the opposite ends of the booster.
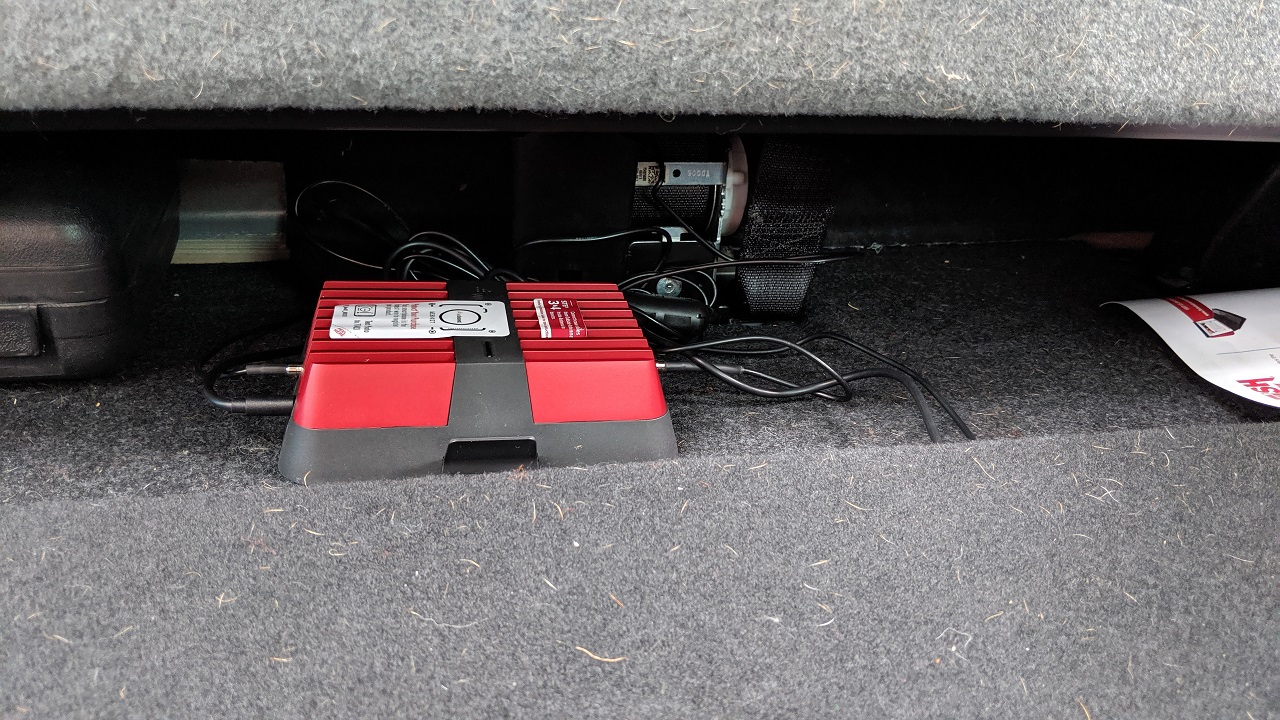
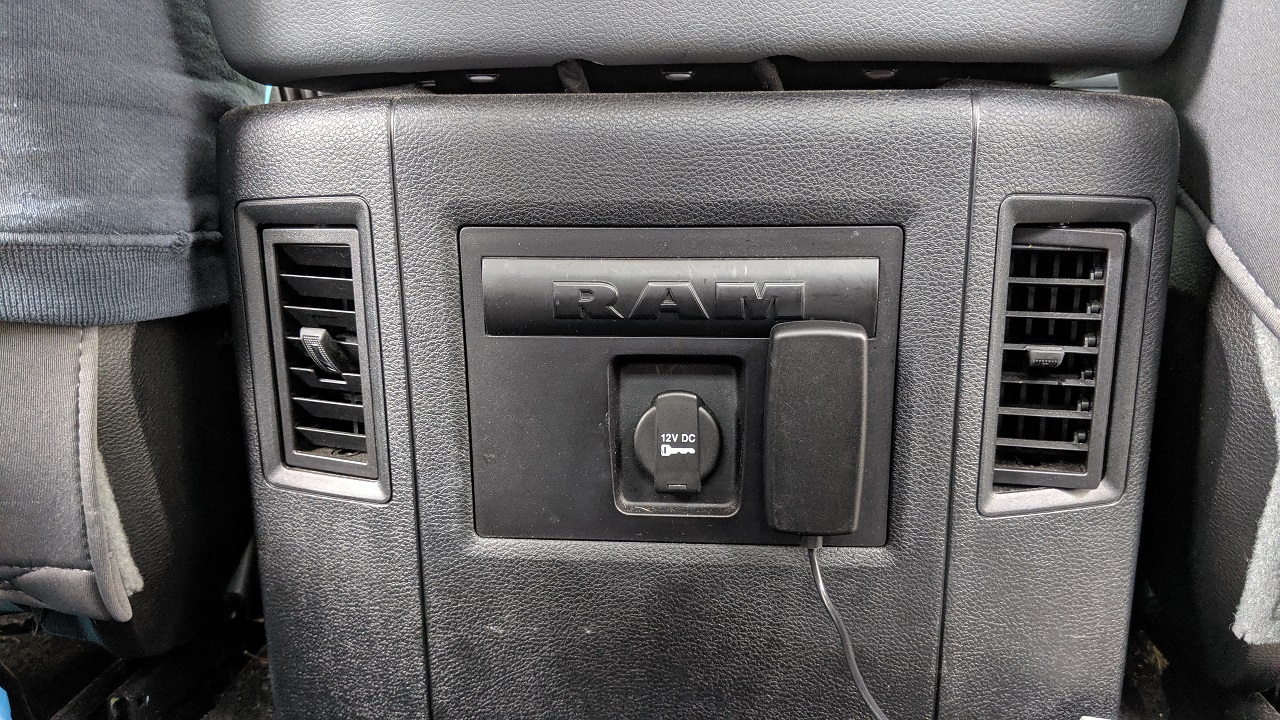
Step 4) Connect the power supply cord to the booster, and secure the booster where it will be located in the vehicle.

Step 5) Plug the power adapter into the vehicle’s 12-volt power supply. The power adapter includes a 5 volt, 2.1-amp USB-A port for cell phone or accessory charging. The product is installed and ready to use.
The way weBoost cell signal boosters work:
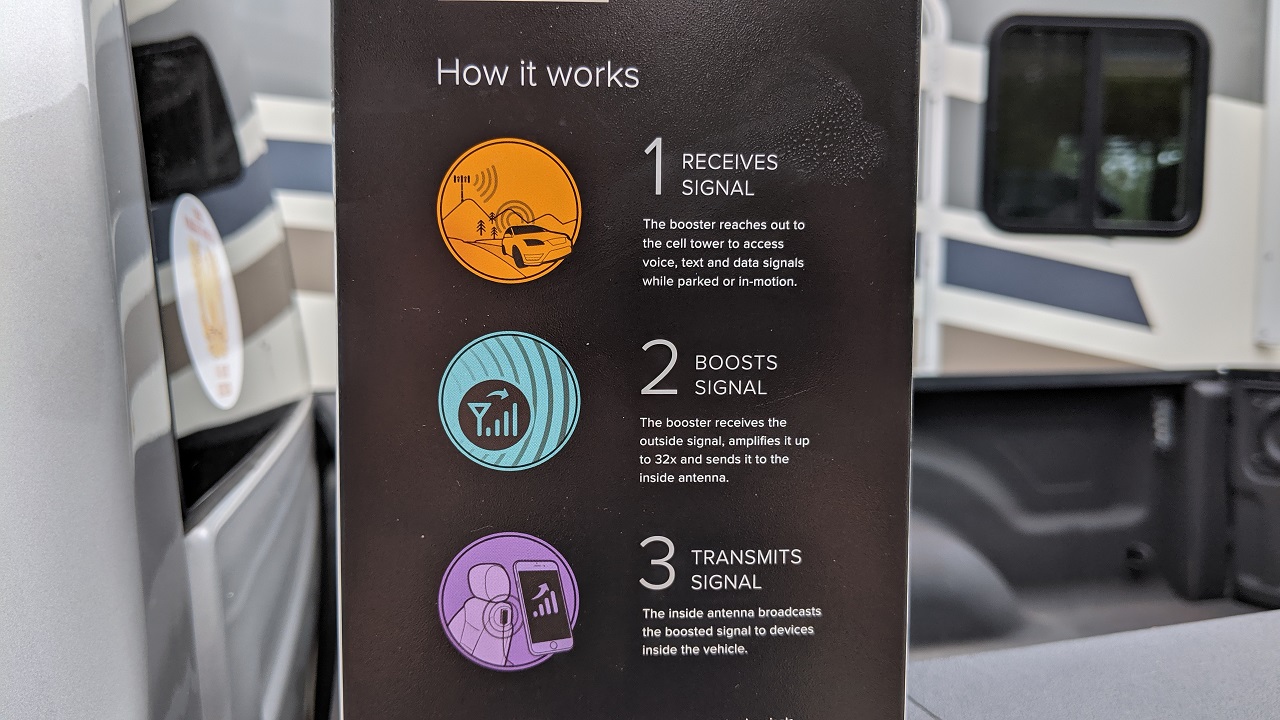
- The outside antenna reaches out to the cell tower to receive the voice, text and data signals. The DRIVE REACH can do this when you are stationary or in-motion.
- Next, the signal is transmitted from the outside antenna to the booster where the signal is amplified up to 32X.
- The amplified signal is sent to the inside antenna where it is broadcast to all the devices in the vehicle.
It really is that easy, and the end result should be more bars, better call quality and faster data rates in weak signal areas. Let’s see how it works.
Testing the weBoost DRIVE REACH:
Speaking of weak signal areas, it’s time to test the DRIVE REACH product. We have terrible cell phone reception at home and in our neighborhood, and on several stretches of the road I use going over to the shop. When you are in these poor reception areas you cannot talk to anybody, without the call dropping call. So to test the product, I will attempt to talk to Dawn in the areas where I always experience dropped calls driving to the shop, and in areas of our neighborhood where calls are dropped as well.

When I plugged the DRIVE REACH into the power outlet, preparing to test the unit, I noticed a red light on the booster. The installation guide said this is caused by feedback, and to correct the problem relocate the outside and inside antennas further apart from each other.
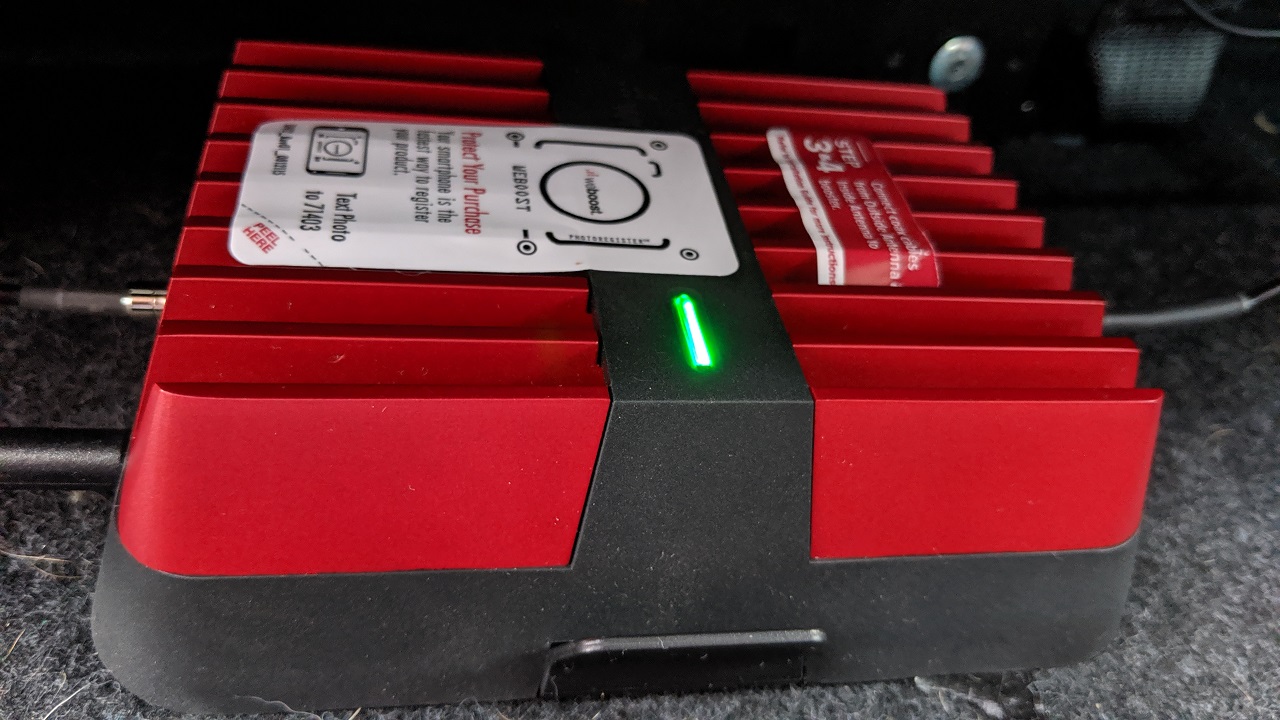
When I plugged the booster back in to the power supply the light was green, indicating the system is functioning properly and there are no issues with the installation. I called Dawn when I got close to the weak cell reception areas and we talked throughout the remainder of my drive to the shop.
The DRIVE REACH test results are in:
In the poor reception areas I noticed my phone only had two bars, and worse case it dropped to one bar, but we were still able to have a phone conversation, and the call never dropped. This is the first time I ever made the drive to my shop while talking on the phone in the weak cell reception areas without the call dropping. Later, when I got back to our neighborhood I called Dawn again, and we talked as I slowly drove through the areas in the neighborhood where it is nearly impossible to talk without a dropped call. Again, we were able to talk the entire time, and the call never dropped. As a final test, when I turned around to go back to the house I turned the DRIVE REACH off. As I drove back to the house I only had one bar on my phone, and our talk was garbled and difficult to understand. This real-world test was proof the Drive Reach product does significantly amplify the signal and broadcast it to my cell phone. Something else I really like is the weBoost two year warranty against defects in workmanship and/or materials.
I am thoroughly pleased with the results of our testing, and I look forward to no more frustration and aggravation with bad cell phone reception and dropped calls. If you would like to see the complete line of cell phone booster products visit the weBoost site
Mark J. Polk
RV Education 101
If you would like to learn more about using and maintaining your RV visit our RV Online Training Program
