Every spring I update and publish my article on how to get your RV ready for spring. Lots can happen when your RV sits in storage for months at a time, tires lose air pressure, batteries lose a percentage of charge, and unexpected problems like water damage can occur when the RV is stored outside. My goal with this RV spring preparation guide is not only to inspect the RV thoroughly, but to correct any problems so the RV is ready to go camping when you are.
Let’s start with the RV’s exterior.
RV Exterior:

Inspect & inflate RV and Tow Vehicle Tires:
Just like a battery loses a percentage of its charge in storage, tires lose a percentage of air pressure. Your tires can lose 2-3 psi a month while sitting in storage. Check the tire pressure using a quality tire inflation gauge, and adjust the inflation pressure to the manufacturer’s recommendation based on the load. Remember, failing to maintain correct tire pressure, based on the load, can result in fast tread wear, uneven wear, poor handling, and excessive heat which can lead to tire failure.
RV 101® Tire Tip: Proper tire inflation can increase fuel economy by 3%, not to mention preventing premature tire wear and failures caused by over or under-inflated tires. Tires can look normal when they are seriously under-inflated.
RV 101®1 Tip: Do not forget to check the spare tire if you have one for the RV.
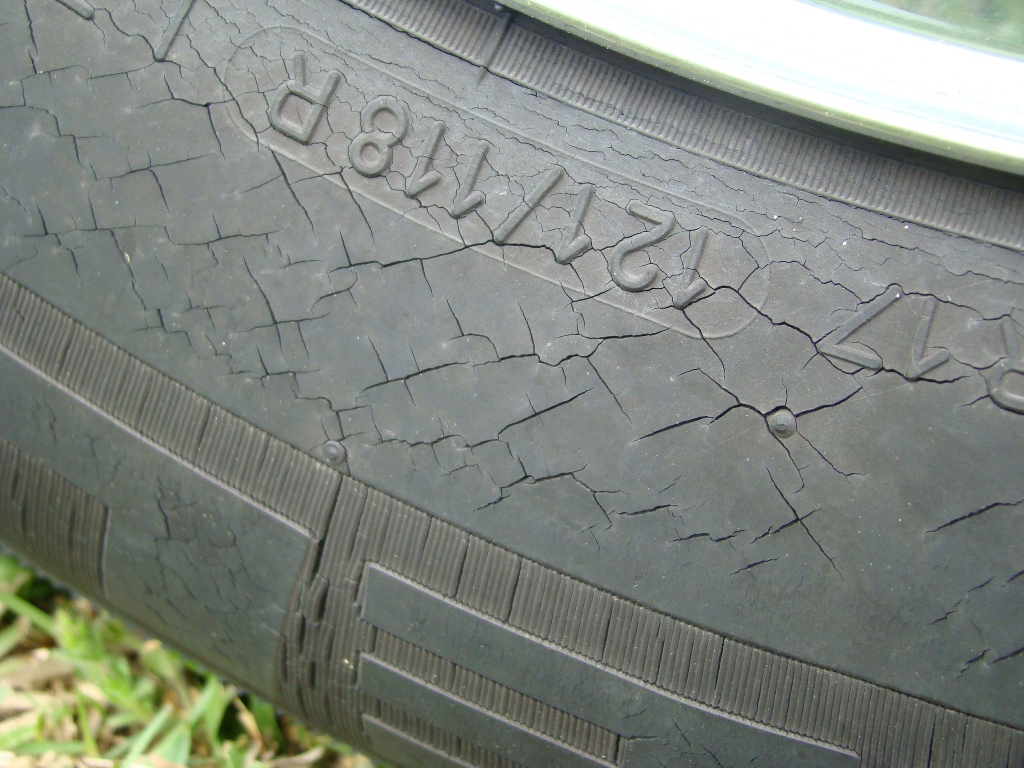
Inspect the tires for any obvious wear patterns, and for any cracking in the tires sidewalls. If any of these conditions exist, have the tires inspected by a professional before using the RV.
RV 101® Tire Inflation Tip: Tire manufacturers publish load and inflation tables that should be followed for proper inflation pressure.
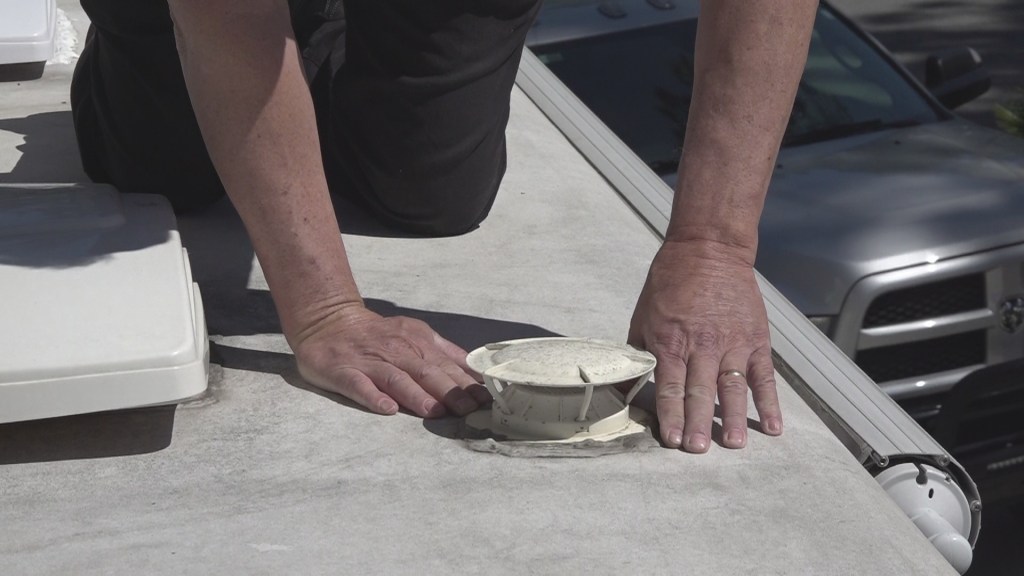
RV Roof Seams & Sealants:
If you didn’t inspect the RV seams and sealants for potential leaks prior to storage, or if the RV was stored outdoors, this is a good time to do your inspections. I recommend inspecting and resealing seams and sealants at least twice a year, and possibly more depending on conditions.
Inspect all roof and body seams, and around any openings cut into the RV, for signs of cracking or damage (roof vents, skylights, vent caps etc.). Reseal any seams or sealants that show signs of cracking or separation. It’s important you consult your RV owner’s manual, or RV dealer for sealants compatible with different types of materials you are attempting to seal. If you don’t feel comfortable performing the inspections, or repairing seams and sealants, have the maintenance performed by an authorized service facility.
RV 101® Tip: To learn more about RV roof care and maintenance click here
Caution: Be extremely careful working on the RV roof. A fall can cause serious injury or death.
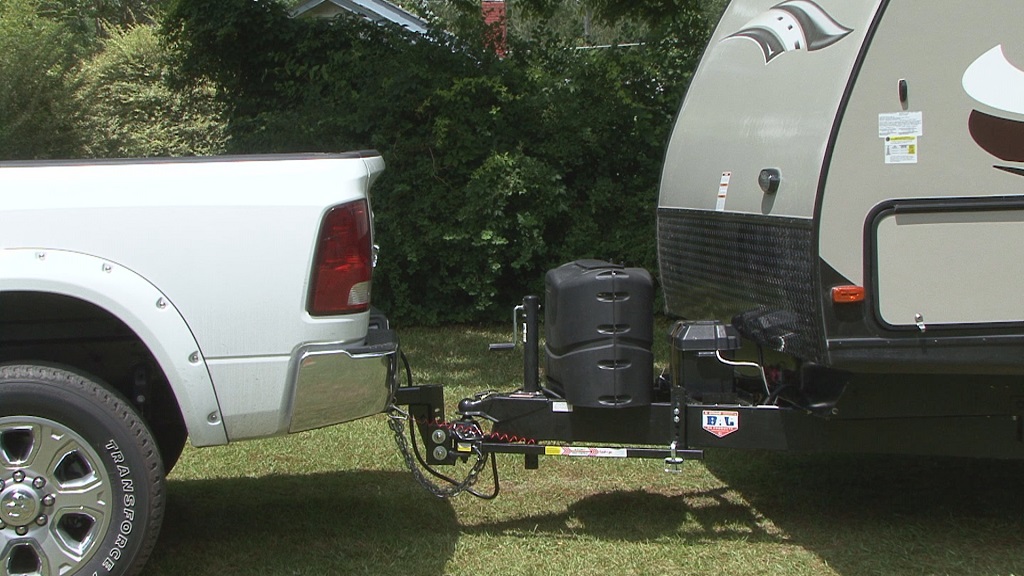
Inspect Hitch Components and/or Tow Bar Hitch Components:
If you have a towable RV inspect the hitch receiver on the tow vehicle and all the hitch components for loose or broken hardware, and for any cracked or broken welds. Inspect the hitch ball, the ball mount, the weight distributing bars and the sway control prior to towing the trailer. If you discover a problem, do not tow a trailer until the damaged towing component is repaired. Hitch the trailer to the tow vehicle and double check all hitch work to ensure it is properly set-up for towing. Test the brake controller prior to towing the trailer. For additional towing checks click here.
If you have a motorized RV and you tow a vehicle behind the RV inspect the tow bar and towing components. Before connecting the tow bar to the vehicle, inspect the vehicle baseplate for secure mounting to the towed vehicle. If you notice any loose or missing hardware on the baseplate, do not
tow the vehicle until it is repaired. Inspect the tow bar and mounting hardware for any damage. Do not use any components of the towing system that are damaged. Check all nuts and bolts for secure mounting. Inspect the hitch receiver on the motorhome. Look for any cracks or breaks in the welds,
and check all the mounting hardware for loose or missing nuts or bolts. Do not tow a vehicle
if you discover a defect on the receiver, until the defect is repaired. If you have a coupler style tow bar, check the fit of the coupler on the ball. Verify the hitch ball is the correct size for the tow bar coupler. Lock the coupler on the hitch ball and secure it with a lock or safety pin.
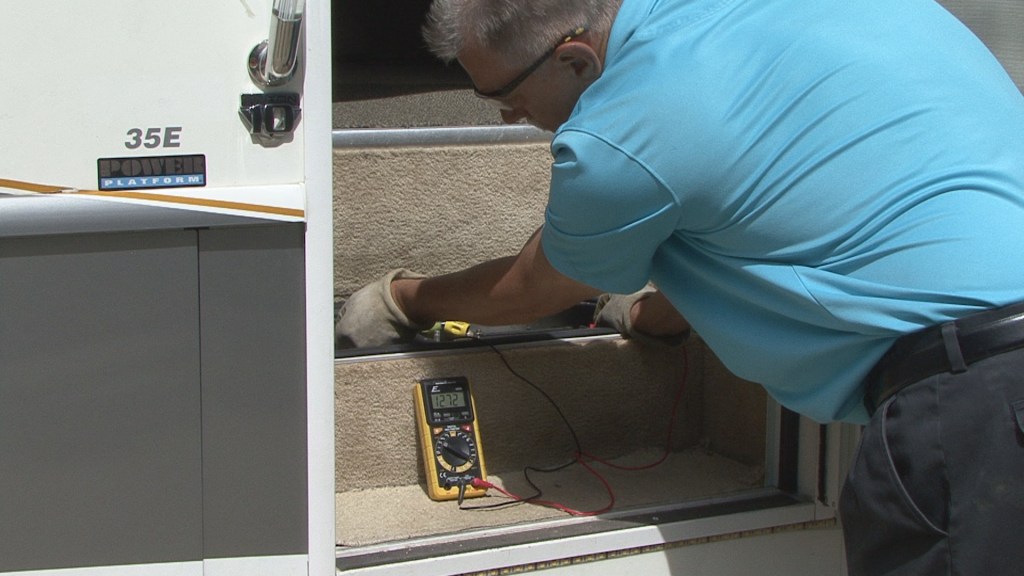
12-Volt DC System – RV Batteries:
Caution: Always keep safety in mind when working around lead-acid batteries. Lead-acid batteries contain sulfuric acid that is extremely corrosive and can cause severe burns or blindness. The hydrogen gas produced by lead-acid batteries during charging is very explosive. When you work around batteries you need to wear goggles, gloves and remove any jewelry. Do not smoke or use any open flames around batteries
I always say, the condition of the batteries is dependent on how well they were cared for during storage. Batteries in storage will lose a percentage of current through internal leakage. It’s not uncommon for a battery to discharge up to 10 percent a month when it is in storage. If you checked, and recharged the batteries periodically while in storage they should be ready to go. If not, the first step is to fully charge the battery.
RV 101®Tip: Water should only be added to a lead-acid battery after fully charging the battery, unless the water level is already below the plates. The plates need to be covered at all times.
After the battery is fully charged, check and add distilled water as required. If the batteries were removed for storage, reinstall the battery making absolutely sure they are connected properly.
Check all battery connections for secure mounting, and clean the batteries with a 50/50 mixture of baking soda and water if necessary. You can use a digital voltmeter to measure voltage and get a quick picture of the batteries depth of discharge. If you don’t feel comfortable working on or around batteries have a reputable RV service center perform battery maintenance for you.
RV 101® Tip: A 12-volt battery that is charged should read 12.5 to 12.7 volts. Readings less than 12.5 indicate the battery state of charge is below 80% and the battery needs to be charged. A 6-volt battery that is charged should read 6.25 to 6.37 volts. Readings below 6.25 indicate the battery state of charge is below 80% and the battery needs to be charged.
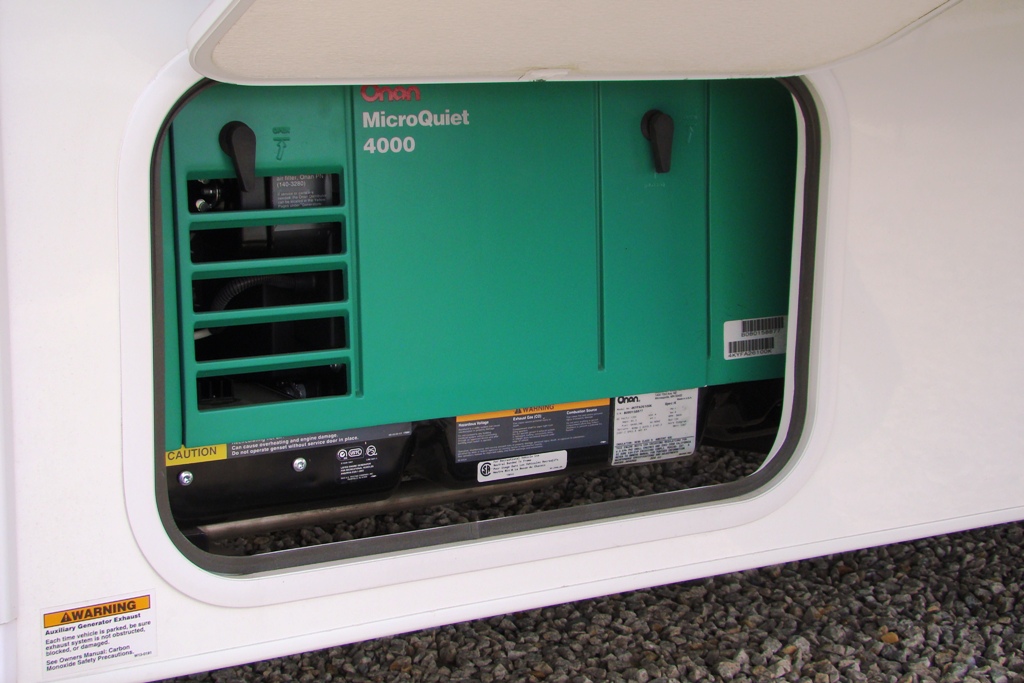
120 Volt AC RV Generator:
Check the onboard generator. Check the oil level in the generator prior to starting it. Service the generator according to specified intervals found in the owner’s manual. Inspect the generator exhaust system for any damage prior to starting. Never run a generator with a damaged exhaust system.
If you didn’t exercise the generator during storage start it now and let it run for about two hours with at least a half-rated load. This exercise routine helps solve several problems related to a generator that sits unused for periods of time. For starters, fuel related problems can occur in as little as one month of sitting idle. This monthly exercise regime removes any old fuel , and lubricates all the engine seals. It also helps prevent carbon build-up. When you exercise your generator it heats up the generator’s windings, and helps eliminate moisture. Exercising the generator not only contributes to a more reliable generator, it extends the life of the generator’s engine as well.
So, as an example, you would exercise a 4000-watt generator with a minimum 2000-watt load.
This is roughly equivalent to running one RV air conditioner, or a small portable electric heater.
If you didn’t use a fuel stabilizer and the generator won’t start, or continues to surge after starting have it checked and repaired by an authorized service facility.
Learn more about the importance of exercising your generator.
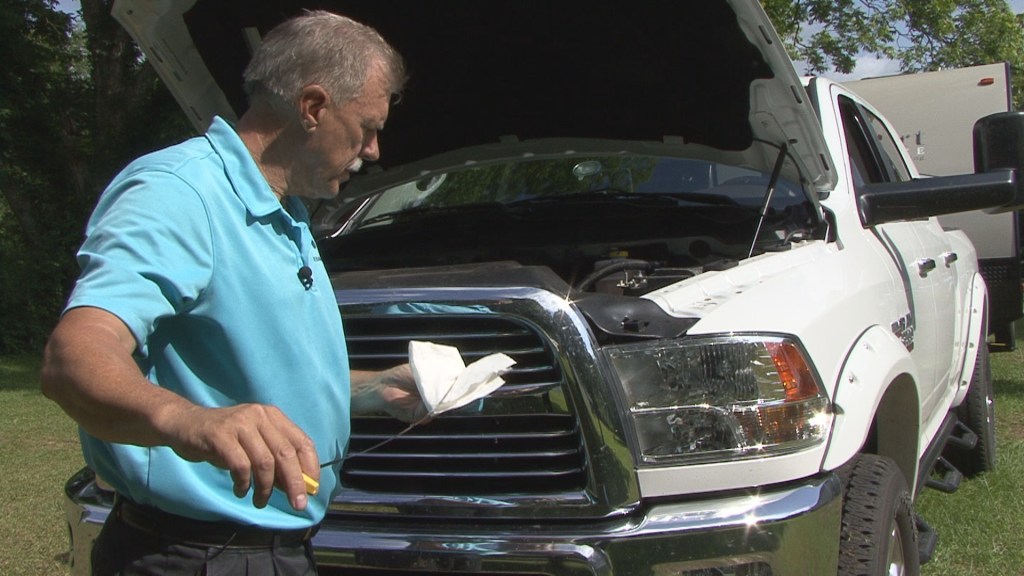
Tow Vehicle and/or Motorhome Engine and Drive Train:
This section pertains to both motorized RVs and tow vehicles. Start by checking all fluid levels. Check the transmission, power steering, engine coolant, engine oil, windshield washer and brake fluid. Consult your vehicle owner’s manual for proper fluid levels. If a fluid level is low try to determine why and correct the problem. Service the engine and engine fluid levels according to specified intervals found in the vehicle owner’s manual. Start the engine and check for proper readings on all gauges. Check the operation of all lights. Make sure the vehicle emissions/inspection is current.
Watch this video to learn more about how to properly check vehicle fluid levels
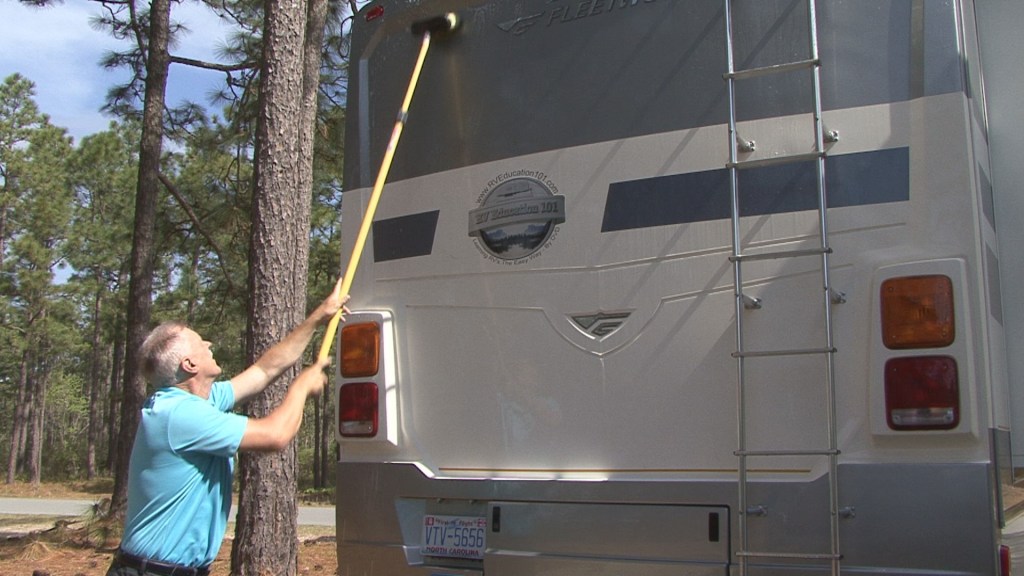
Wash The Exterior of the RV:
Use a soap that is compatible with the surface of the RV. There are lots of cleaners on the market, but the important thing is to use a product designed specifically for your RV’s exterior. If you RV’s exterior is metal a good quality car soap is all you need.
RV 101® Tip: For washing and waxing fiberglass RV exteriors look at what boat owner’s use.
Use a long handled brush with soft bristles to reach the high spots and use a wash glove or mitt for the easy to reach areas. RV’s are tall and the only way to reach those high spots is to use a brush designed for cleaning RVs. Make sure the surface is rinsed off first and use the long handled brush with soap and water to reach the high places.
RV 101® Tip: Always start at the top and work your way down. This applies to washing your vehicles too.
When you use commercial cleaners, like black streak remover, always read the instructions for the best cleaning results and to protect the RV’s paint and graphics from possible damage. Always test commercial cleaners in a inconspicuous area on the RV before using the product on your RV. Some cleaners can damage the painted surface, graphics or other surfaces on the RV.
Avoid washing the RV in direct sunlight and/or if it is extremely hot outside. Rinse the area you plan to wash first. Always wash from the top down and rinse the cleaned area immediately after washing it. Work in 10-foot sections at a time so the soap doesn’t have a chance to dry. When you are rinsing the soap from the exterior surface avoid spraying water directly at or in any of the appliance vents like the furnace and water heater.
RV Interior:
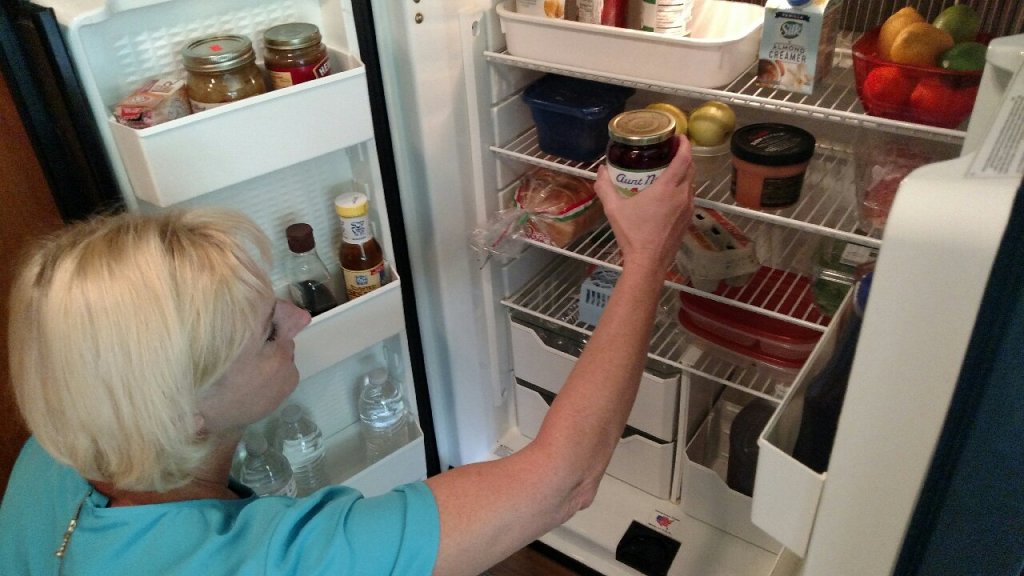
RV Appliances:
If there is gas in the LP gas cylinders or LP gas tank open the gas supply and check the operation of the LP gas fired appliances. Make sure the water heater tank is full of water before testing the operation of the water heater. If an LP gas appliance is not operating properly have it inspected by an authorized RV service facility. Insects are attracted to the odorant added to LP gas and they build nests that can affect the appliance from operating properly.
Note: The LP gas system should have a leak test and LP gas operating pressure test performed annually. These tests should be performed by an authorized RV repair facility.
Check the furnace, range, water heater and the refrigerator in the LP gas mode. If all of the LP gas appliances operate properly, plug the unit into electricity and test the 120-volt appliances and accessories for proper operation. Make sure you have an adequate electrical source (30-50 amps) depending on your unit, prior to testing items like the microwave and roof air conditioner. After checking the refrigerator in the LP gas mode turn it off, and with the doors open allow sufficient time for it to return to room temperature before checking it in the electric mode.
Dewinterize the RV Water System:
After sitting in storage for several months the RV water system needs to be dewinterized, checked for leaks and sanitized. Make sure the freezing weather is gone for good prior to dewinterizing the plumbing system.
If your unit was winterized using non-toxic RV/Marine antifreeze you need to run fresh water through the entire water system until all traces of the antifreeze are removed. Hopefully no antifreeze was added to the fresh water holding tank, but if it was the first step is to drain all remnants of antifreeze from the fresh water tank. You should try to catch the antifreeze in a container or bucket to prevent it from draining on the ground. Next add some potable water to the fresh water holding tank and turn the 12-volt on-demand water pump on.
Note: If you notice any water leaks turn the water pump off and try to identify and repair the leak if possible.
Open all of the water faucets (one at a time) and run the water until there are no traces of the pink antifreeze at the faucets. Make sure you open both hot and cold water faucets. When the water is running clear take the water heater out of the by-pass mode (if applicable). If the water heater wasn’t bypassed the antifreeze will need to be drained from the water heater tank too. The antifreeze that was in the plumbing system will go into the gray water holding tank and can be emptied later. Now you can replace any water filter cartridges that were removed for storage.
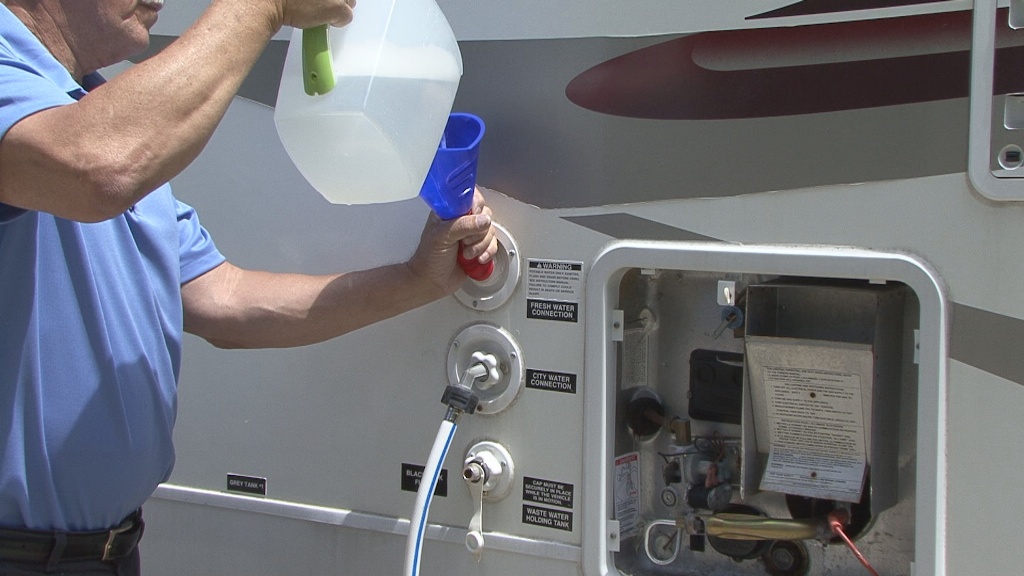
Sanitize the RV Water System:
When I take the RV out of storage I like to sanitize the RV water system, especially if RV antifreeze was in the plumbing system. Make sure all of the drains are closed and all drain plugs are installed. Take a quarter-cup of household bleach for every 15-gallons of water your fresh water tank holds. Mix the bleach with water into a one-gallon container and pour the solution into to the fresh water tank fill.
Caution: If you have an on-demand water heater with a copper heat exchanger, the water heater must be by-passed. Do not run chlorinated water through the water heater.
Fill the fresh water holding tank with potable water. Turn the water pump on and run water through all of the hot and cold faucets until you smell the bleach. Close the faucets and let this solution sit for twelve hours. Drain all of the water and re-fill the tank with potable water. Turn the water pump on and open all faucets, running the water until you no longer smell any bleach. It might be necessary to repeat this process to eliminate all signs of bleach.
Check Plumbing System for Leaks:
This is a good time to check the RV plumbing system for leaks. With water in the fresh water holding tank turn the 12-volt water pump on and pressurize the water system until the pump shuts off. If the water pump cycles back on, even for a short period of time, there could be a leak somewhere in the system. Locate the leak and repair it or take it to an RV service facility to be checked out and repaired.
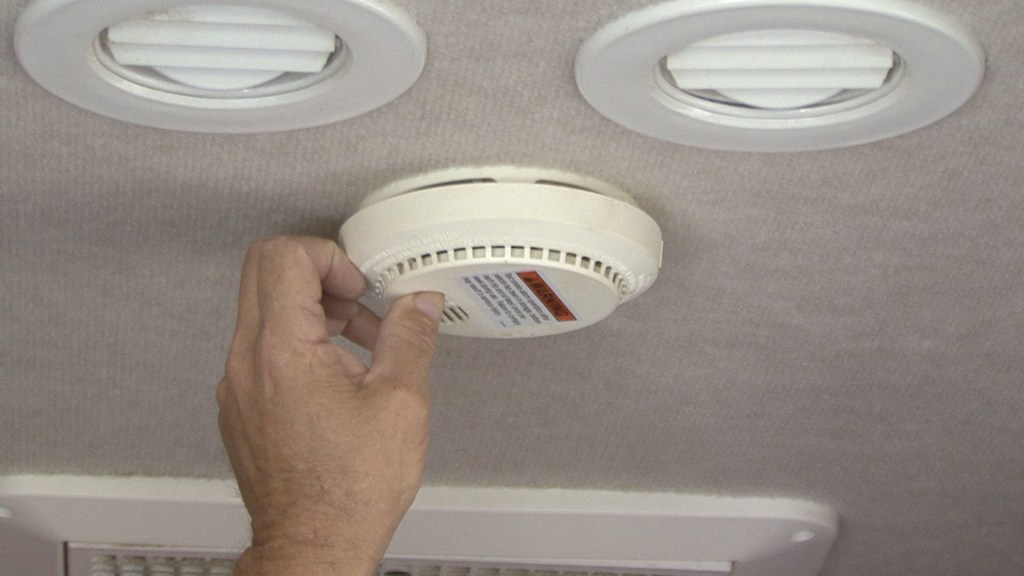
Test RV Safety Devices:
It’s important to inspect and test all of the RV safety devices for proper operation after sitting in storage. Re-install any dry-cell batteries or fuses that were removed for storage. If batteries were not removed from safety devices it’s a good idea to replace them with new batteries now.
Test the operation of the carbon monoxide detector, LP gas leak detector and the smoke alarm. Inspect all fire extinguishers to make sure they are fully charged. If you have dry powder fire extinguishers shake it and tap it on the bottom to release any powder that settled to the bottom. Review how to properly use a fire extinguisher in the event you need to use it.
Carbon Monoxide is deadly. Make sure everybody understands what carbon monoxide is, what the symptoms of carbon monoxide poisoning are, and what to do if you are exposed to CO gas. If you own an older RV that isn’t equipped with a CO detector, I highly recommend you purchase and install a CO detector designed for use in RVs.
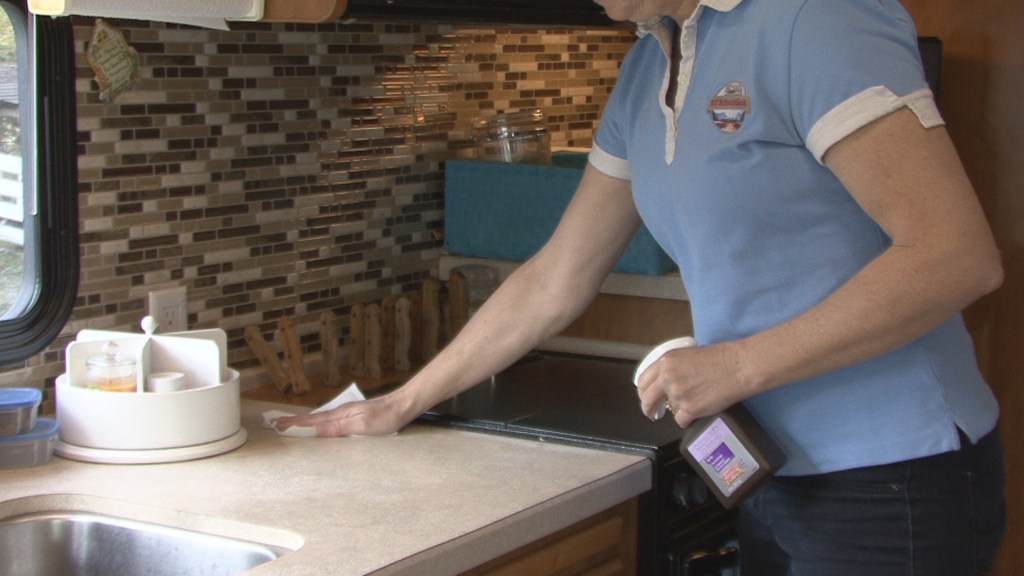
Clean the RV Interior:
Thoroughly clean the interior of the RV. Do not use harsh abrasive cleaners that can damage surfaces. While cleaning the interior look for anything that may need repairs or maintenance.
Well, there you have it. Now that the interior and exterior components of your RV, and all the safety devices are inspected and tested you are on your way to enjoying another camping season in your RV.
Happy Camping,
Mark Polk
RV Education 101®
http://rveducation101.com/
RV 101® Travel Trailer Ultimate Video & E-book Bundle
https://rvonlinetraining.com/p/travel-trailer-ultimate-e-book-and-video-bundle
RV 101® 5th Wheel Ultimate Video & E-book Bundle
https://rvonlinetraining.com/p/rv-101-5th-wheel-ultimate-video-e-book-bundle
RV 101® Motorhome Ultimate Video & E-book Bundle
https://rvonlinetraining.com/p/rv-101-motorhome-ultimate-video-e-book-bundle
Travel Trailer & 5th Wheel Trailer RV Orientation Video Training Course
https://rvonlinetraining.com/p/rv-101-rv-orientation-for-travel-trailer-s-5th-wheel-trailers
Tow Your Travel Trailer Like a Pro Video Training Course
https://rvonlinetraining.com/p/rv-101-trailer-towing-basics
Tow Your 5th Wheel Like a Pro Complete Online Video Training Course
https://rvonlinetraining.com/p/tow-your-5th-wheel-like-a-pro
Motorhome RV Orientation Video Training Course
https://rvonlinetraining.com/p/motorhome-rv-orientation-video-training-course
Drive Your Motorhome Like A Pro Complete Online Video Training Course
https://rvonlinetraining.com/p/drive-your-motorhome-like-a-pro
RV Care & Preventive Maintenance RV DIY® Online Video Training
https://rvonlinetraining.com/p/rv-101-rv-care-preventive-maintenance-online-video-training
RV Essential Items Video Training Course
https://rvonlinetraining.com/p/rv-essential-items
Winterizing and Storing Your RV Video Training Course
https://rvonlinetraining.com/p/winterizing-and-storing-your-rv-video
Travel Trailer 4 Video Bargain Set Plus Free RV Checklist ebook
https://rvonlinetraining.com/p/travel-trailer-video-bundle
5th Wheel 4 Video Bargain Set Plus Free RV Checklist ebook
https://rvonlinetraining.com/p/5th-wheel-video-bundle
Motorhome 4 Video Bargain Set Plus Free RV Checklist ebook
https://rvonlinetraining.com/p/motorhome-video-bundle
———————–
A Collection of RV Education 101 E-Books – 9 RV E-BOOK BUNDLE SET
https://rvonlinetraining.com/p/a-collection-of-rv-education-101-e-books-9-rv-e-book-bundle-set
An Introduction to RVs E-book Training Course
https://rvonlinetraining.com/p/an-introduction-to-rvs
Insider’s Guide to Buying an RV E-Book Training Course
https://rvonlinetraining.com/p/insider-s-guide-to-buying-an-rv-downloadable-pdf-e-book
Owning & Operating an RV E-Book Training Course
https://rvonlinetraining.com/p/owning-operating-an-rv
The Original Checklists for RVers E-Book Training Course
https://rvonlinetraining.com/p/the-original-checklist-s-for-rvers
RV Campground Basics E-Book Training Course
https://rvonlinetraining.com/p/rv-campground-basics-e-book-course
RV Safety Features, Tips & Tricks E-book Training Course
https://rvonlinetraining.com/p/rv-safety-features-tips-tricks
RV Care & Maintenance E-Book Training Course
https://rvonlinetraining.com/p/rv-care-maintenance-e-book-course
Winterizing & Storing Your RV E-Book Training Course
https://rvonlinetraining.com/p/winterizing-storing-your-rv-e-book
RV Battery Care & Maintenance E-Book Training Course
https://rvonlinetraining.com/p/rv-battery-care-maintenance
Trailer Towing Basics E-Book Training Course
https://rvonlinetraining.com/p/trailer-towing-basics-e-book
